Ready to take your health and fitness to the next level? Explore our website, dive into our blog content, try out our free health calculator tools, and stay updated with the latest sports and fitness news. At CLASSYFIT, we’re here to guide and support you every step of the way on your journey to a happier, healthier you. Welcome to the CLASSYFIT family
क्या आप इंडियन प्रीमियर लीग (आईपीएल) के लिए ड्रीम11 पर अपने खेल को बेहतर बनाने के लिए उत्सुक हैं? एक विजेता टीम तैयार करने के लिए रणनीतिक योजना और प्रमुख कारकों पर सावधानीपूर्वक विचार करने की आवश्यकता होती है। इस गाइड में, हम आपको एक मजबूत लाइनअप बनाने की चरण-दर-चरण प्रक्रिया के बारे में बताएंगे जो आपको आईपीएल सीज़न के दौरान फंतासी खेलों में जीत हासिल करने में मदद कर सकती है।
टीम चयन में उतरने से पहले, आईपीएल मैचों के लिए ड्रीम11 के लिए विशिष्ट स्कोरिंग प्रणाली और नियमों को समझना महत्वपूर्ण है। प्रत्येक आईपीएल टूर्नामेंट में स्कोरिंग मानदंड में भिन्नता हो सकती है, जो आपकी टीम-निर्माण रणनीति को प्रभावित कर सकती है।
2. अनुसंधान और विश्लेषण:
सफल फंतासी टीम का निर्माण गहन शोध से शुरू होता है, खासकर आईपीएल मैचों के लिए। सूचित निर्णय लेने के लिए आगामी आईपीएल फिक्स्चर, खिलाड़ियों के प्रदर्शन, मौसम की स्थिति, पिच रिपोर्ट, आमने-सामने के रिकॉर्ड और चोट के अपडेट का विश्लेषण करें। सफल फंतासी टीम का निर्माण गहन शोध से शुरू होता है, खासकर आईपीएल मैचों के लिए। सूचित निर्णय लेने के लिए आगामी आईपीएल फिक्स्चर, खिलाड़ियों के प्रदर्शन, मौसम की स्थिति, पिच रिपोर्ट, आमने-सामने के रिकॉर्ड और चोट के अपडेट का विश्लेषण करें।
3. संतुलित टीम चयन:
आईपीएल में लगातार अच्छा प्रदर्शन करने के लिए एक संतुलित टीम हासिल करना जरूरी है। आईपीएल प्रतियोगिताओं के लिए इष्टतम टीम संरचना सुनिश्चित करने के लिए बल्लेबाजों, गेंदबाजों, ऑलराउंडरों और विकेटकीपरों के बीच अपना बजट बुद्धिमानी से आवंटित करें।
4. प्रमुख खिलाड़ियों पर ध्यान दें:
आईपीएल टीमों के उत्कृष्ट प्रदर्शन करने वालों की पहचान करें जिनमें महत्वपूर्ण प्रभाव डालने की क्षमता है। इन प्रमुख खिलाड़ियों में अक्सर इंडियन प्रीमियर लीग में लगातार अच्छा प्रदर्शन करने वाले, बड़े हिटर और विकेट लेने वाले गेंदबाज शामिल होते हैं।
5. मैच की शर्तों पर विचार करें:
आईपीएल मैचों के लिए अपनी टीम को अंतिम रूप देते समय स्थल, पिच की स्थिति, मौसम का पूर्वानुमान और टॉस के परिणाम जैसे कारकों को ध्यान में रखें। आईपीएल के लिए विशिष्ट मैच स्थितियों को अपनाना आपको ड्रीम11 प्रतियोगिताओं में प्रतिस्पर्धात्मक बढ़त दिला सकता है।
6. मूल्य चयन रणनीति:
कम मूल्य वाले आईपीएल खिलाड़ियों की खोज करें जो अपने मूल्य टैग से बेहतर प्रदर्शन करने की क्षमता रखते हैं। मूल्य चयन का विकल्प चुनने से आप इंडियन प्रीमियर लीग के दौरान बजट बाधाओं के भीतर रहते हुए अपनी टीम की क्षमता को अधिकतम कर सकते हैं।
7. मॉनिटर प्लेयर फॉर्म:
ड्रीम11 टीमों के लिए सोच-समझकर चयन करने के लिए आईपीएल खिलाड़ियों के फॉर्म, हालिया प्रदर्शन और सांख्यिकीय रुझानों पर नज़र रखें। अच्छे फॉर्म में रहने वाले खिलाड़ियों के इंडियन प्रीमियर लीग के दौरान लगातार परिणाम देने की अधिक संभावना होती है।
8. टीम समाचार से अपडेट रहें:
आईपीएल प्लेइंग इलेवन में आखिरी मिनट में बदलाव, चोटों या खिलाड़ी की उपलब्धता के लिए सतर्क रहें। इंडियन प्रीमियर लीग में नवीनतम विकास के आधार पर अपनी आईपीएल ड्रीम11 टीम को समायोजित करने के लिए लचीलापन महत्वपूर्ण है।
9. कप्तान और उप-कप्तान चयन:
अपने आईपीएल कप्तान और उप-कप्तान को बुद्धिमानी से चुनें, क्योंकि वे ड्रीम 11 प्रतियोगिताओं में अतिरिक्त अंक अर्जित करने में महत्वपूर्ण भूमिका निभाते हैं। ऐसे आईपीएल खिलाड़ियों को चुनें जिनमें इंडियन प्रीमियर लीग के आगामी मैचों में उत्कृष्ट प्रदर्शन करने की क्षमता हो।
10. अपनी टीम की समीक्षा करें और उसे अंतिम रूप दें:
अपनी आईपीएल ड्रीम11 टीम तय करने से पहले, एक अच्छी तरह से संतुलित लाइनअप सुनिश्चित करने के लिए अपने चयन की समीक्षा करें। इंडियन प्रीमियर लीग के लिए नवीनतम अंतर्दृष्टि और भविष्यवाणियों के आधार पर कोई भी आवश्यक समायोजन करें।
11. रणनीतिक रूप से प्रतियोगिताओं में शामिल हों:
ड्रीम11 प्रतियोगिताओं का चयन करें जो आपकी जोखिम उठाने की क्षमता और आईपीएल मैचों के लिए जीतने की रणनीति के अनुरूप हों। कई प्रतियोगिताओं में अपनी प्रविष्टियों में विविधता लाने से इंडियन प्रीमियर लीग सीज़न के दौरान आपकी सफलता की संभावना बढ़ सकती है।
12. ट्रैक प्रदर्शन और अनुकूलन:
मैचों के दौरान अपनी आईपीएल ड्रीम11 टीम के प्रदर्शन की निगरानी करें और इंडियन प्रीमियर लीग में सामने आने वाले परिदृश्यों के आधार पर वास्तविक समय में रणनीतिक प्रतिस्थापन या सामरिक समायोजन करने के लिए तैयार रहें।
निष्कर्ष:
इन चरण-दर-चरण रणनीतियों का पालन करके, आप आईपीएल मैचों के लिए एक अद्वितीय और विजेता ड्रीम 11 टीम बना सकते हैं। याद रखें कि सूचित रहें, लचीले रहें और सबसे महत्वपूर्ण बात यह है कि इंडियन प्रीमियर लीग के दौरान फंतासी खेलों के रोमांच का आनंद लें!
Introduction: Back pain is a common issue affecting people of all ages and lifestyles. Whether it’s caused by poor posture, sedentary habits, or stress, incorporating gentle yoga stretches into your routine can provide relief and promote flexibility and strength in the back muscles. This inaction routine is designed to be accessible to all levels, focusing on gentle movements and breath awareness to alleviate tension and discomfort in the back.
Yoga can offer effective relief for back pain. Here are some poses you can try:
Back Pain Relief Exercise Chart
Cat-Cow Stretch
Start on your hands and knees, with wrists under shoulders and knees under hips. Inhale, arch your back, and lift your head and tailbone towards the ceiling (Cow Pose). Exhale, round your spine, tuck your chin to your chest, and draw your belly button towards your spine (Cat Pose). Repeat for 10-15 repetitions, moving with your breath.
Pelvic Tilts
Lie on your back with knees bent and feet flat on the mat. Inhale to prepare, then exhale and tilt your pelvis, flattening your lower back against the floor. Inhale and release the tilt, allowing a natural arch in your lower back. Repeat for 10-15 repetitions, focusing on engaging your abdominal muscles.
Child’s Pose with Reach
Start in a kneeling position with toes together and knees apart. Sit back on your heels and extend your arms forward on the mat. Inhale deeply, then exhale and reach your right hand towards the left side, feeling a stretch along the right side of your back. Hold for 15-30 seconds, then switch sides. Repeat 2-3 times on each side.
Bird Dog
Begin on your hands and knees, with wrists under shoulders and knees under hips. Extend your right arm forward and your left leg back, keeping your hips level and core engaged. Hold for 5-10 seconds, then return to the starting position. Repeat on the opposite side, alternating sides for 8-10 repetitions.
Bridge Pose
Lie on your back with knees bent and feet hip-width apart. Press into your feet and lift your hips towards the ceiling, engaging your glutes and core. Hold for 10-15 seconds, then slowly lower back down to the mat. Repeat for 8-10 repetitions, focusing on maintaining a straight line from shoulders to knees.
Seated Spinal Twist
Sit on the floor with legs extended in front of you. Bend your right knee and place the foot outside the left thigh. Inhale, lengthen your spine, and exhale, twisting gently to the right. Hold onto the right knee with your left hand and place your right hand behind you for support. Hold for 15-30 seconds, then switch sides. Repeat 2-3 times on each side.
Here’s a food chart outlining a selection of foods that may help reduce inflammation and alleviate back pain:
Back Pain Relief Food Chart
Introduction: Proper nutrition plays a vital role in managing inflammation and supporting overall health, including the health of your back. Incorporating anti-inflammatory foods into your diet can help reduce pain and discomfort. Below is a chart outlining foods to include in your meals for back pain relief.
Back Pain Relief Food Chart
Back Pain Relief Food Chart
Food Group
Foods to Include
Fruits and Berries
Pineapple, Cherries, Blueberries, Oranges
Vegetables
Leafy greens (spinach, kale), Broccoli, Bell peppers, Tomatoes
Healthy Fats
Avocado, Olive oil, Nuts and seeds (walnuts, flaxseeds)
Omega-3 Rich Foods
Salmon, Mackerel, Sardines
Whole Grains
Quinoa, Brown rice, Oats, Whole grain breads and pasta
Lean Proteins
Chicken breast, Turkey breast, Lean cuts of beef and pork, Tofu, Legumes (beans, lentils)
Herbs and Spices
Turmeric, Ginger, Garlic, Cinnamon
Beverages
Green tea, Herbal teas (chamomile, ginger), Watermelon juice
Dairy Alternatives
Almond milk, Coconut milk, Soy milk
Tips:
Aim to include a variety of colors in your meals, as different colored fruits and vegetables provide a range of vitamins, minerals, and antioxidants.
Limit processed foods, sugary snacks, and foods high in saturated fats, as these can contribute to inflammation.
Stay hydrated by drinking plenty of water throughout the day, as dehydration can exacerbate pain and stiffness.
Conclusion:By incorporating these back pain relief foods into your diet on a regular basis, you can help support your body’s natural healing processes and reduce inflammation, leading to improved back health and overall well-being. Remember to consult with a healthcare professional for personalized dietary advice and recommendations.
Feel free to adjust the food chart based on personal preferences and dietary restrictions.
These poses can help stretch and strengthen the muscles supporting your back, potentially alleviating pain and improving flexibility. Remember to move gently and listen to your body’s signals. If you have any concerns or chronic back issues, consult with a healthcare professional before practicing yoga.
Conclusion: Incorporate this gentle inaction routine into your daily or weekly schedule to promote back health and alleviate pain and discomfort. Remember to listen to your body and modify poses as needed to suit your individual needs and limitations. With consistent practice, you can cultivate greater ease and freedom of movement in your back, enhancing your overall well-being.
Yoga for Back Pain Relief:
These poses can help stretch and strengthen the muscles supporting your back, potentially alleviating pain and improving flexibility. Remember to move gently and listen to your body’s signals. If you have any concerns or chronic back issues, consult with a healthcare professional before practicing yoga. Incorporate this gentle inaction routine into your daily or weekly schedule to promote back health and alleviate pain and discomfort. Remember to listen to your body and modify poses as needed to suit your individual needs and limitations. With consistent practice, you can cultivate greater ease and freedom of movement in your back, enhancing your overall well-being.
A Complete Guide to Moon Salutation Steps for a Tranquil Yoga Practice: In the realm of yoga, the Sun Salutation (Surya Namaskar) is widely known and practiced for its energizing and revitalizing effects. However, there’s another equally potent sequence that often remains in the shadows—the Moon Salutation (Chandra Namaskar). This gentle yet profound series of poses offers a soothing and introspective practice, perfectly attuned to the calming energies of the moon. Let’s delve into the serene journey of Moon Salutation steps.
Moon Salutation Sequence
Step
Pose
Description
1
Mountain Pose (Tadasana)
Stand tall with feet together, arms at sides.
2
Half Moon Pose (Ardha Chandrasana)
Step left foot back, reach left arm overhead, stretch right side.
3
Forward Fold (Uttanasana)
Exhale, hinge at hips, fold forward, reach hands towards floor.
Step left foot back, align body in a straight line, engage core.
6
Eight-Limbed Pose (Ashtanga Namaskara)
Lower knees, chest, and chin to floor, keep hips lifted.
7
Cobra Pose (Bhujangasana)
Inhale, lift chest and gaze up, keeping elbows close to sides.
8
Downward-Facing Dog (Adho Mukha Svanasana)
Exhale, lift hips up and back, straighten arms and legs.
9
Lunge Pose (Anjaneyasana)
Step right foot forward, lift chest, reach arms up.
10
Forward Fold (Uttanasana)
Exhale, step left foot forward, fold forward, reach hands down.
11
Half Moon Pose (Ardha Chandrasana)
Step left foot forward, reach right arm overhead, stretch left side.
12
Mountain Pose (Tadasana)
Inhale, rise up to standing, return to starting position.
Note: Repeat the sequence on the opposite side (e.g., step right foot back in Half Moon Pose).
Step 1: Setting the Stage Begin in Tadasana (Mountain Pose) at the top of your mat. Ground yourself firmly, aligning your feet hip-width apart, and engage your core muscles. Let your palms rest by your sides, facing forward, with a relaxed yet attentive posture.
Step 2: Invocation Bring your hands together in front of your heart in Anjali Mudra (Prayer Position). Take a moment to center yourself, acknowledging the quiet strength and tranquility of the moon. Set an intention for your practice, whether it’s finding inner peace, cultivating serenity, or simply connecting with the rhythms of nature.
Step 3: Crescent Moon Inhale deeply as you raise your arms overhead, palms facing each other. As you exhale, gently arch your body to the right, creating a crescent shape with your torso. Keep your feet firmly grounded as you stretch through the left side of your body, feeling a gentle opening from your fingertips to your hips. Hold this position for a breath or two, savoring the elongation and expansion.
Step 4: Forward Fold On your next inhale, return to center with your arms overhead. As you exhale, hinge at your hips and fold forward, keeping your spine long and your chest reaching towards your thighs. You can bend your knees slightly if needed to maintain a comfortable stretch. Allow your head to hang heavy, releasing any tension in your neck and shoulders.
Step 5: Halfway Lift Inhale as you lift your torso halfway, lengthening your spine and bringing your fingertips to either your shins or the floor. Keep your gaze forward, elongating the back of your neck, and engage your abdominal muscles to support your lower back.
Step 6: Low Lunge Exhale as you step your left foot back into a low lunge position, with your right knee directly above your right ankle. Lower your left knee to the mat if necessary, and untuck your toes. Sink into the stretch, feeling a gentle opening in the front of your left hip and thigh. Keep your chest lifted and your gaze soft.
Step 7: Plank Pose From your low lunge, step your right foot back to meet your left, coming into a high plank position. Align your shoulders over your wrists, engage your core muscles, and lengthen through your heels. Keep your body in a straight line from head to heels, avoiding any sagging or lifting in the hips.
Step 8: Chaturanga Dandasana (Four-Limbed Staff Pose) Exhale as you lower yourself halfway down, keeping your elbows hugged close to your sides. Your upper arms should be parallel to the floor, and your body should remain in a straight line. If needed, you can drop your knees to the mat for a modified version of the pose.
Step 9: Upward-Facing Dog (Urdhva Mukha Svanasana) Inhale as you press through your palms and straighten your arms, lifting your chest and gaze towards the sky. Keep your shoulders rolled back and down, opening through the front of your body. The tops of your feet should be the only parts of your lower body touching the mat.
Step 10: Downward-Facing Dog (Adho Mukha Svanasana) Exhale as you lift your hips up and back, coming into an inverted V shape with your body. Press firmly through your palms and heels, lengthening through your spine and drawing your belly towards your thighs. Keep your head relaxed between your arms, and take a few breaths here to settle into the pose.
Step 11: Low Lunge (Opposite Side) Inhale as you step your left foot forward between your hands, returning to a low lunge position on the opposite side. Once again, sink into the stretch and feel the opening in the front of your right hip and thigh. Keep your chest lifted and your gaze soft, breathing deeply into the pose.
Step 12: Halfway Lift Exhale as you step your right foot forward to meet your left, coming into a halfway lift with your spine long and your fingertips reaching towards the floor or your shins. Maintain a strong core and a gentle bend in your knees if needed.
Step 13: Forward Fold Inhale as you fold forward once again, releasing any tension in your neck and shoulders as you let your head hang heavy. Feel the lengthening through the back of your legs and the release in your lower back as you surrender to the pose.
Step 14: Crescent Moon (Opposite Side) Exhale as you rise up, sweeping your arms overhead and arching gently to the left to create a crescent shape with your torso. Feel the stretch through the right side of your body, from your fingertips to your hips, as you breathe deeply into the pose.
Step 15: Mountain Pose Inhale as you return to Tadasana (Mountain Pose) at the top of your mat, standing tall and grounded with your palms facing forward. Take a moment to acknowledge the effects of your practice, noticing any sensations or shifts in your body and mind.
Conclusion: The Moon Salutation offers a beautiful opportunity to honor the calming and introspective energies of the moon, inviting a sense of serenity and balance into your yoga practice. As you flow through each pose with mindfulness and intention, allow yourself to connect with the quiet strength and stillness within. May your journey under the moon’s gentle glow be one of peace, harmony, and self-discovery.
Moon SalutationsBenefits:
Moon Salutations, also known as Chandra Namaskar in yoga, offer a myriad of benefits for both the body and mind. Here’s a comprehensive look at the advantages of incorporating Moon Salutations into your yoga practice:
Benefits of Moon Salutation
Calms the mind and reduces stress
Improves flexibility and mobility
Stretches and strengthens the body
Promotes relaxation and better sleep
Enhances balance and coordination
Regulates menstrual cycle (women)
Encourages mindfulness
Mindful Meditation: Moon Salutations provide a serene and introspective practice, allowing practitioners to cultivate mindfulness and inner peace. The rhythmic flow of movements synchronized with breath encourages a meditative state, promoting mental clarity and relaxation.
Balancing Energy: Just as the moon’s gentle glow balances the darkness of the night, Moon Salutations help balance the energy within the body. The calming and cooling nature of these poses counteracts the heat and intensity often associated with Sun Salutations, creating equilibrium within the practitioner.
Stress Reduction: Moon Salutations are renowned for their calming effect on the nervous system. The slow, deliberate movements combined with deep breathing promote relaxation and alleviate stress, helping practitioners unwind after a long day and find tranquility amidst life’s chaos.
Improved Flexibility: Flowing through the sequence of Moon Salutations gently stretches and lengthens the muscles, promoting flexibility and mobility throughout the body. Regular practice can help release tension in tight areas, such as the hips, hamstrings, and shoulders, allowing for greater ease of movement in daily activities.
Enhanced Circulation: The dynamic nature of Moon Salutations stimulates blood flow and circulation, delivering oxygen and nutrients to the muscles, organs, and tissues. This increased circulation promotes detoxification, rejuvenation, and overall vitality, leaving practitioners feeling refreshed and energized.
Emotional Healing: Moon Salutations encourage introspection and emotional release, providing a safe space for practitioners to explore and process their feelings. The gentle, fluid movements facilitate the release of stagnant energy and emotional blockages, promoting emotional balance and well-being.
Accessible for Beginners: Moon Salutations offer a gentle introduction to yoga for beginners or those with physical limitations. The slow pace and modified poses make it accessible for individuals of all ages and fitness levels to experience the benefits of yoga without strain or intimidation.
Variety of Sequences: Moon Salutations can be customized and adapted to suit individual needs and preferences. Practitioners can explore various sequences, modifications, and variations to tailor their practice to specific goals or areas of focus, whether it’s relaxation, strength-building, or spiritual exploration.
Home Practice: Moon Salutations can be practiced virtually anywhere, making them ideal for home practice or when traveling. With minimal space and equipment required, practitioners can create a peaceful sanctuary within their own homes and incorporate Moon Salutations into their daily routine for sustained well-being.
Complement to Sun Salutations: Just as the sun and moon complement each other in nature, Moon Salutations complement Sun Salutations in yoga practice. While Sun Salutations energize and invigorate, Moon Salutations offer a counterbalance, promoting calmness and introspection. Integrating both into your practice creates a harmonious union of opposing energies, fostering holistic health and balance.
Incorporating Moon Salutations into your yoga practice can provide a multitude of benefits for body, mind, and spirit. Whether you’re seeking stress relief, flexibility, or emotional healing, embracing the gentle rhythm of Chandra Namaskar can lead you on a journey of self-discovery and transformation.
Diseases Benefit byMoon Salutations:
Moon Salutations, like many forms of yoga, are not specifically aimed at treating diseases. However, they can contribute to overall health and well-being, which may indirectly benefit individuals managing certain health conditions. Here are some ways in which Moon Salutations can support overall health:
Anxiety Disorders
Depression
Insomnia
Chronic Pain
Hypertension
Digestive Disorders
Arthritis
Stress-Related Conditions: Moon Salutations are excellent for stress reduction and promoting relaxation. Conditions such as anxiety, depression, and insomnia, which are exacerbated by stress, may see improvement with regular practice.
Musculoskeletal Disorders: The gentle stretching and movement involved in Moon Salutations can help improve flexibility and alleviate tension in the muscles and joints. This may provide relief for conditions like arthritis, back pain, and stiffness.
Cardiovascular Health: Yoga practices, including Moon Salutations, can contribute to cardiovascular health by promoting circulation, reducing stress, and improving overall fitness levels. While they are not a direct treatment for heart disease, they can be part of a holistic approach to heart health.
Respiratory Conditions: Deep breathing techniques incorporated into Moon Salutations can enhance lung capacity and improve respiratory function. While not a replacement for medical treatment, they may provide supplementary support for conditions like asthma or chronic obstructive pulmonary disease (COPD).
Digestive Disorders: Some yoga practices, including gentle movements like those found in Moon Salutations, may help stimulate digestion and alleviate symptoms of digestive disorders like irritable bowel syndrome (IBS) or indigestion.
Autoimmune Conditions: While Moon Salutations are not a direct treatment for autoimmune diseases, they can support overall health and immune function by reducing stress, promoting relaxation, and improving sleep quality.
It’s essential to approach yoga, including Moon Salutations, as a complementary practice rather than a standalone treatment for specific diseases. Individuals with medical conditions should consult with a healthcare professional before beginning any new exercise regimen to ensure it is safe and appropriate for their needs.
A Comprehensive Guide for Sun Salutation Yoga: Discover the step-by-step instructions for each pose of Surya Namaskar/Sun Salutation yoga in our comprehensive guide. Incorporate this powerful yoga sequence into your daily routine to improve flexibility, strength, and mental clarity. Experience the benefits of weight loss, increased energy levels, and enhanced overall well-being. Start your journey to a healthier lifestyle today with Surya Namaskar.
Step-by-Step Guide:
Sun Salutations for Beginners Vinyasa Yoga Sun Salutations Sun Salutations Variations Sun Salutations Sequence
Pranamasana (Prayer Pose):Stand at the front of your mat with feet together, palms pressed together in front of the chest in prayer position.
Hasta Uttanasana (Raised Arms Pose): Inhale deeply and raise your arms overhead, arching slightly backward and stretching the whole body.
Hasta Padasana (Hand to Foot Pose): Exhale and bend forward from the waist, keeping the spine straight. Touch the floor with your hands beside your feet or hold your ankles.
Ashwa Sanchalanasana (Equestrian Pose): Inhale and step the right leg back into a lunge, keeping the left knee bent at a 90-degree angle and the left foot flat on the ground. Look up.
Dandasana (Stick Pose): Retain your breath as you bring the left leg back, aligning the body in a straight line from head to heels, arms perpendicular to the floor, palms flat on the ground.
Ashtanga Namaskara (Salute with Eight Parts or Points): Exhale and lower your knees, chest, and chin to the ground while keeping the hips raised and elbows close to the body.
Bhujangasana (Cobra Pose): Inhale and slide forward, raising the chest and head off the ground while keeping the navel on the floor. Elbows should be slightly bent.
Parvatasana (Mountain Pose): Exhale and lift the hips and tailbone upward, creating an inverted V shape. Keep the heels flat on the ground and the head between the arms.
Ashwa Sanchalanasana (Equestrian Pose): Inhale and step the right foot forward between the hands, keeping the left knee on the ground. Look up.
Hasta Padasana (Hand to Foot Pose): Exhale and bring the left foot forward to meet the right, bending forward from the waist with the spine straight.
Hasta Uttanasana (Raised Arms Pose): Inhale and sweep the arms overhead, arching slightly backward and stretching the whole body.
Pranamasana (Prayer Pose): Exhale and return to the starting position, standing with feet together and palms pressed together in front of the chest.
Sun Salutations Sequence Benefits of Sun Salutations Sun Salutations at Home
Benefits:
Improves Flexibility: Surya Namaskar stretches and tones the muscles, improving overall flexibility in the body.
Strengthens Muscles: The sequence of poses engages various muscle groups, helping to build strength and stamina.
Promotes Weight Loss: Surya Namaskar is a dynamic practice that increases metabolism, aiding in weight loss and fat burning.
Enhances Circulation: The rhythmic movements of Surya Namaskar improve blood circulation, delivering oxygen and nutrients to the cells and promoting detoxification.
Calms the Mind: The synchronized breathing with movement helps to calm the mind, reduce stress, and improve mental clarity.
Boosts Energy Levels: Regular practice of Surya Namaskar increases vitality and energy levels, leaving you feeling refreshed and rejuvenated.
Balances Hormones: The practice of Surya Namaskar stimulates the endocrine glands, helping to balance hormonal levels in the body.
Improves Digestion: The gentle compression and stretching of the abdominal organs during Surya Namaskar massages the digestive system, aiding in digestion and elimination.
Overall, Surya Namaskar is a holistic practice that benefits the body, mind, and spirit, promoting overall health and well-being.
Sun Salutations, like Moon Salutations, are not aimed at treating specific diseases. However, they offer numerous health benefits that can support overall well-being and may indirectly benefit individuals managing certain health conditions. Here are some ways in which Sun Salutations can help:
Stress Reduction: Sun Salutations are dynamic sequences that synchronize movement with breath, promoting relaxation and reducing stress levels. This can benefit individuals dealing with stress-related conditions such as anxiety, depression, and insomnia.
Improved Flexibility and Mobility: Sun Salutations involve a series of fluid movements that stretch and strengthen the entire body, including muscles, joints, and connective tissues. Regular practice can improve flexibility and mobility, which may be beneficial for individuals with musculoskeletal disorders like arthritis or back pain.
Cardiovascular Health: The dynamic nature of Sun Salutations increases heart rate and promotes blood circulation, which can contribute to cardiovascular health. While not a substitute for traditional cardiovascular exercises, Sun Salutations can be part of a well-rounded fitness routine.
Respiratory Health: Sun Salutations incorporate deep breathing techniques that enhance lung capacity and improve respiratory function. This can be beneficial for individuals with respiratory conditions such as asthma or chronic obstructive pulmonary disease (COPD).
Digestive Health: The rhythmic movement and deep breathing in Sun Salutations can stimulate digestion and improve gastrointestinal function. This may provide relief for individuals with digestive disorders like indigestion or constipation.
Energy Boost: Sun Salutations are invigorating and can help increase energy levels, making them particularly beneficial for individuals experiencing fatigue or lethargy.
Mental Clarity and Focus: The combination of movement, breath, and mindfulness in Sun Salutations can enhance mental clarity and focus. This can benefit individuals dealing with cognitive issues or difficulty concentrating.
Weight Management: While not a direct weight loss tool, Sun Salutations can be part of a comprehensive approach to weight management by increasing calorie expenditure, improving metabolism, and promoting overall fitness.
It’s important to note that Sun Salutations, like any form of exercise, should be practiced mindfully and in accordance with individual capabilities. Individuals with medical conditions should consult with a healthcare professional before starting any new exercise regimen to ensure it is safe and appropriate for their needs.
Description:
Learn how to perform Surya Namaskar (Sun Salutation) yoga steps with our comprehensive guide. Discover the step-by-step instructions for each pose along with the benefits of incorporating Surya Namaskar into your daily routine. Improve flexibility, strength, and mental clarity while promoting weight loss, boosting energy levels, and enhancing overall well-being. Start your journey to a healthier lifestyle today with Surya Namaskar.
Optimize Your Health Crafting a Nutrient-Rich Fit Body Diet Plan with Portion Control, Healthy Snack Ideas, and Sustainable Meal Planning.
Daily Meals Consumption
Daily Meals Consumption
Mon
3 meals (30%)
Tue
4 meals (40%)
Wed
3 meals (30%)
Thu
2 meals (20%)
Fri
5 meals (50%)
Sat
3 meals (30%)
Sun
4 meals (40%)
7-Day Diet Chart
7-Day Diet Chart
Day
Breakfast
Lunch
Dinner
Monday
Oatmeal with fruits
Grilled chicken salad
Quinoa with roasted vegetables
Tuesday
Whole grain toast with avocado
Vegetable stir-fry with tofu
Salmon with sweet potatoes
Wednesday
Greek yogurt with honey and nuts
Whole wheat pasta with marinara sauce
Grilled vegetables with brown rice
Thursday
Scrambled eggs with spinach
Quinoa salad with chickpeas
Lean beef with steamed broccoli
Friday
Smoothie with spinach, banana, and almond milk
Grilled shrimp with quinoa
Vegetable curry with rice
Saturday
Whole grain pancakes with berries
Grilled vegetable wrap
Grilled chicken with mixed greens
Sunday
Fruit salad with yogurt
Bean and vegetable soup
Roasted turkey with roasted vegetables
7-Day Nutrient-Rich Meal Plan Delicious and Balanced Recipes for a Healthy Lifestyle.
Day 1:
Breakfast: Start your day with a hearty breakfast of oatmeal topped with sliced bananas and a sprinkle of almonds for added crunch and protein.
Lunch: Enjoy a colorful salad made with mixed greens, cherry tomatoes, cucumber slices, grilled chicken breast, and a drizzle of balsamic vinaigrette dressing.
Dinner: For dinner, indulge in a flavorful baked salmon fillet served with roasted sweet potatoes and steamed broccoli on the side.
Day 2:
Breakfast: Whip up a delicious smoothie using spinach, kale, banana, Greek yogurt, and a splash of almond milk for a refreshing and nutrient-packed start to your day.
Lunch: Prepare a quinoa salad with diced bell peppers, black beans, corn kernels, avocado slices, and a squeeze of lime juice for a satisfying and protein-rich midday meal.
Dinner: Cook up a batch of turkey and vegetable stir-fry with a colorful medley of bell peppers, snap peas, carrots, and broccoli, served over brown rice for a wholesome and flavorful dinner option.
Day 3:
Breakfast: Enjoy a protein-packed breakfast burrito filled with scrambled eggs, sautéed spinach, diced tomatoes, and a sprinkle of shredded cheese, wrapped in a whole wheat tortilla for a delicious morning meal.
Lunch: Opt for a light and refreshing tuna salad made with canned tuna, diced celery, red onion, Greek yogurt, and a dash of mustard, served on a bed of mixed greens with whole grain crackers on the side.
Dinner: Treat yourself to a cozy bowl of homemade vegetable soup filled with hearty ingredients like carrots, celery, onions, lentils, and spinach, simmered in a flavorful broth for a nourishing and comforting dinner option.
Day 4:
Breakfast: Start your day with a stack of whole grain pancakes topped with fresh berries and a drizzle of maple syrup for a sweet and satisfying breakfast treat.
Lunch: Prepare a Mediterranean-inspired wrap filled with hummus, sliced cucumber, roasted red peppers, crumbled feta cheese, and baby spinach, wrapped in a whole wheat tortilla for a flavorful and nutritious midday meal.
Dinner: Enjoy a cozy bowl of spaghetti squash topped with marinara sauce, lean ground turkey, sautéed mushrooms, and grated Parmesan cheese for a light and satisfying dinner option.
Day 5:
Breakfast: Fuel up for the day ahead with a protein-packed Greek yogurt parfait layered with granola, fresh berries, and a drizzle of honey for a delicious and nutritious morning meal.
Lunch: Prepare a vibrant Buddha bowl filled with cooked quinoa, roasted chickpeas, sliced avocado, shredded carrots, steamed broccoli, and a dollop of tahini dressing for a nourishing and satisfying midday meal.
Dinner: Cook up a batch of homemade vegetable curry made with a medley of seasonal vegetables, chickpeas, coconut milk, and aromatic spices, served over a bed of brown rice for a flavorful and comforting dinner option.
Day 6:
Breakfast: Start your day with a classic bowl of overnight oats made with rolled oats, chia seeds, almond milk, and a dollop of peanut butter, topped with sliced bananas and a sprinkle of cinnamon for a nutritious and filling breakfast option.
Lunch: Prepare a colorful and nutrient-packed kale salad topped with roasted butternut squash, dried cranberries, toasted pumpkin seeds, crumbled goat cheese, and a drizzle of balsamic vinaigrette dressing for a satisfying and flavorful midday meal.
Dinner: Enjoy a cozy bowl of homemade lentil soup filled with hearty ingredients like lentils, diced tomatoes, carrots, celery, and kale, simmered in a flavorful broth for a nourishing and comforting dinner option.
Day 7:
Breakfast: Treat yourself to a leisurely weekend brunch with a stack of whole grain waffles topped with fresh fruit, Greek yogurt, and a drizzle of pure maple syrup for a sweet and indulgent morning meal.
Lunch: Prepare a vibrant and flavorful taco salad filled with seasoned ground turkey, black beans, corn, diced tomatoes, shredded lettuce, sliced avocado, and a dollop of Greek yogurt for a satisfying and protein-rich midday meal.
Dinner: Cook up a batch of homemade vegetable stir-fry with a colorful mix of bell peppers, broccoli, snap peas, carrots, and tofu, stir-fried in a tangy and flavorful sauce served over a bed of brown rice for a delicious and nutritious dinner option.
Each day’s meal plan features a variety of nutrient-rich ingredients to help you feel satisfied and energized throughout the day while supporting your overall health and well-being.
Description:
Unlock your health potential with our 7-day nutrient-rich meal plan, featuring delicious and balanced recipes designed to support your fitness goals. From hearty breakfasts to flavorful lunches and comforting dinners, each day’s menu is carefully crafted with wholesome ingredients to keep you satisfied and energized. Say goodbye to bland meals and hello to nourishing eating with our customizable meal plan tailored to your needs.
Yoga Through the Ages From Ancient Wisdom to Modern Wellness – Exploring Origins, Evolution, and Traditions in a Journey of Harmony and Unity.
Yoga is a set of practices that originated in ancient India, aiming to bring harmony to the body, mind, and spirit. The word “yoga” means “union” or “yoke,” signifying the union of individual consciousness with universal consciousness. It encompasses physical exercises, mental techniques, and spiritual disciplines.
The roots of yoga can be traced back to ancient Hindu scriptures like the Rigveda and Upanishads, where references to yoga-like practices are found. The term “yoga” was first mentioned with its current meaning in the Katha Upanishad, dating back to the 5th to 3rd centuries BCE. Over time, yoga evolved into a systematic study and practice, particularly during the ascetic movements in ancient India.
Yoga benefits
Yoga poses
Yoga for beginners
Here’s some guidance for beginners starting with yoga:
Start Slow: Begin with basic poses and gradually progress to more challenging ones as you build strength and flexibility.
Focus on Breathing: Pay attention to your breath during each pose. Deep, steady breathing helps you relax and enhances the benefits of yoga.
Listen to Your Body: Honor your body’s limitations and don’t push yourself too hard. Yoga is about self-awareness and self-care.
Use Props: Props like blocks, straps, and bolsters can assist you in maintaining proper alignment and ease into poses comfortably.
Find a Qualified Teacher: Consider taking classes from a certified yoga instructor who can guide you safely through the practice.
Consistency is Key: Aim for regular practice, even if it’s just a few minutes a day. Consistency helps you progress and reap the full benefits of yoga.
7. Stay Present: Focus on the present moment during your practice, letting go of distractions and thoughts about the past or future.
8. Stay Hydrated and Nourished: Drink water before and after your practice, and eat a light meal or snack if needed before you begin.
9. Rest and Recover: Incorporate restorative poses and relaxation techniques into your practice to help your body recover and rejuvenate.
10. Enjoy the Journey: Approach your yoga practice with curiosity and openness. Embrace the journey of self-discovery and enjoy the physical, mental, and emotional benefits along the way.
The Yoga Sutras of Patanjali, written in the early Common Era, are considered one of the most comprehensive texts on yoga philosophy. Yoga philosophy became established as one of the six orthodox schools of Hinduism in the first millennium CE.
There are two main theories about the origins of yoga. The linear model suggests that yoga originated during the Vedic period and influenced Buddhism. The synthesis model proposes that yoga is a blend of Vedic and non-Vedic elements.
Here’s some guidance on yoga poses:
Mountain Pose (Tadasana): Stand tall with feet hip-width apart, arms at your sides, and shoulders relaxed. Engage your core and lengthen through the spine, reaching the crown of your head toward the sky.
Downward-Facing Dog (Adho Mukha Svanasana): Start on your hands and knees, then lift your hips up and back, forming an inverted V-shape with your body. Press your palms into the mat and keep your heels reaching toward the ground.
Warrior I (Virabhadrasana I): Step one foot back into a lunge position, with the front knee bent at a 90-degree angle and the back leg straight. Square your hips forward, reach your arms overhead, and gaze up toward your hands.
Warrior II (Virabhadrasana II): From Warrior I, open your hips and shoulders to the side as you extend your arms out parallel to the floor. Keep your front knee bent and aligned with your ankle, with your gaze over your front hand.
Yoga meditation
Yoga lifestyle
Yoga philosophy
5. Tree Pose (Vrksasana): Stand on one leg and place the sole of your other foot on the inner thigh or calf of the standing leg. Press your foot into your thigh or calf while maintaining balance, and bring your hands together at your heart center or extend them overhead.
6. Child’s Pose (Balasana): Kneel on the mat, then sit back on your heels and fold forward, bringing your forehead to the ground and arms extended in front or resting alongside your body. Relax your forehead, neck, and shoulders.
7. Cobra Pose (Bhujangasana): Lie on your stomach with your palms flat on the ground next to your chest. Press into your hands to lift your chest and head off the mat, keeping your elbows close to your body and shoulders relaxed.
8. Seated Forward Bend (Paschimottanasana): Sit on the mat with legs extended in front of you. Hinge at the hips to fold forward, reaching for your feet or shins with your hands. Keep your spine long and lead with your heart.
9. Corpse Pose (Savasana): Lie flat on your back with arms and legs extended, palms facing up. Close your eyes and relax your entire body, letting go of tension in muscles and allowing your breath to flow naturally.
10. Cat-Cow Pose (Marjaryasana-Bitilasana): Start on your hands and knees in a tabletop position. Inhale as you arch your back, lifting your chest and tailbone for Cow Pose. Exhale as you round your back, tucking your chin to your chest for Cat Pose. Repeat, flowing smoothly between the two poses.
In the Western world, “yoga” commonly refers to a modern form known as Hatha yoga, which focuses on physical postures (asanas) for fitness, stress relief, and relaxation. This differs from traditional yoga, which emphasizes meditation and spiritual liberation. Hatha yoga gained popularity in the West after Indian gurus, influenced by Swami Vivekananda, introduced it in the late 19th and early 20th centuries.
Yoga retreats
Yoga teacher training
Yoga for stress relief
Here’s some guidance on the benefits of yoga:
Physical Health: Yoga improves flexibility, strength, and balance. Regular practice can help reduce the risk of injury, improve posture, and increase overall physical fitness.
Stress Reduction: Yoga promotes relaxation and stress relief through deep breathing and mindfulness techniques. It helps calm the mind, lower cortisol levels, and alleviate symptoms of anxiety and depression.
Mental Clarity: Yoga enhances mental focus and concentration by encouraging present-moment awareness. It can improve cognitive function, memory, and overall mental clarity.
Emotional Well-being: Yoga cultivates emotional resilience and self-awareness, allowing practitioners to better cope with life’s challenges. It promotes a sense of inner peace, contentment, and emotional balance.
5. Improved Sleep: Practicing yoga regularly can help regulate sleep patterns and improve the quality of sleep. Relaxation techniques and mindful breathing promote deep relaxation, making it easier to fall asleep and stay asleep.
6. Boosted Immunity: Yoga supports a healthy immune system by reducing inflammation, promoting circulation, and enhancing the body’s natural defense mechanisms. It can help prevent illness and promote faster recovery from illness or injury.
7. Pain Management: Yoga can be an effective tool for managing chronic pain conditions such as back pain, arthritis, and migraines. It increases flexibility, strengthens muscles, and improves posture, reducing strain on the body and alleviating pain.
8. Increased Energy: Regular yoga practice boosts energy levels by improving circulation, oxygenating the body, and reducing fatigue. Dynamic yoga sequences can invigorate the body and mind, leaving practitioners feeling energized and revitalized.
9. Enhanced Self-awareness: Yoga encourages self-reflection and introspection, deepening the connection between mind, body, and spirit. It fosters self-awareness, self-acceptance, and a greater sense of inner peace and harmony.
10. Community and Connection: Yoga provides an opportunity to connect with like-minded individuals and build a supportive community. Group classes, workshops, and retreats offer a sense of belonging and connection, fostering friendships and social support networks.
Overall, yoga has evolved over thousands of years, adapting to various cultural contexts and gaining recognition as a holistic practice for physical, mental, and spiritual well-being.
Here’s an introduction to some different types of yoga:
Hatha Yoga: Hatha yoga is a traditional form of yoga that focuses on physical postures (asanas) and breathing techniques (pranayama). It emphasizes balance, strength, and flexibility, making it suitable for beginners.
Vinyasa Yoga: Vinyasa yoga, also known as flow yoga, involves flowing sequences of poses coordinated with breath. It’s a dynamic and fluid practice that builds strength, endurance, and mindfulness.
Yin Yoga: Yin yoga is a slow-paced style of yoga that targets the connective tissues, such as ligaments, tendons, and fascia. Poses are held for longer periods, typically 3-5 minutes or more, to encourage deep relaxation and release tension.
Restorative Yoga: Restorative yoga focuses on relaxation and rejuvenation, using props like blankets, bolsters, and blocks to support the body in gentle poses. It’s designed to promote deep rest and stress relief, making it ideal for relaxation and healing.
Iyengar Yoga: Iyengar yoga emphasizes precision and alignment in poses, using props to help students achieve correct form. It’s a methodical and detail-oriented practice that is accessible to practitioners of all levels.
Ashtanga Yoga: Ashtanga yoga is a dynamic and physically demanding practice that follows a specific sequence of poses linked with breath. It’s known for its rigorous structure and progressive series of postures, promoting strength, flexibility, and stamina.
Kundalini Yoga: Kundalini yoga focuses on awakening the energy at the base of the spine (kundalini) through a combination of dynamic movements, breathing techniques, chanting, and meditation. It’s a spiritual and transformative practice that aims to cultivate awareness and vitality.
Yoga for stress relief
Yoga for flexibility
8. Bikram Yoga: Bikram yoga, also known as hot yoga, consists of a series of 26 poses practiced in a room heated to a high temperature. The heat enhances flexibility and detoxification, while the sequence provides a full-body workout.
9. Jivamukti Yoga: Jivamukti yoga is a modern yoga style that integrates physical postures with spiritual teachings, music, chanting, and meditation. It’s a dynamic and creative practice that emphasizes environmentalism, veganism, and social activism.
10. Power Yoga: Power yoga is a vigorous and athletic style of yoga inspired by Ashtanga and Vinyasa yoga. It focuses on building strength, stamina, and flexibility through fast-paced sequences and challenging poses.
Navigating the Rich Tapestry of Yoga A Journey from Ancient Origins to Modern Revival
Embark on an enriching voyage through the vibrant history and contemporary resurgence of yoga, a timeless practice that continues to captivate enthusiasts worldwide. In this comprehensive exploration, we’ll delve into the etymology, definitions, goals, and pivotal moments that have shaped the evolution of yoga, offering insights to both seasoned practitioners and curious newcomers.
History: The history of yoga is rich and spans thousands of years, originating in ancient India. While the exact origins of yoga are debated among scholars, it is believed to have evolved over several millennia, with roots in ancient Indian scriptures and traditions.
HISTORY OF YOGA
Prehistoric Origins: The earliest evidence of yogic practices dates back to the prehistoric Indus Valley civilization, around 3000 BCE. Archaeological findings, such as seals depicting figures in yoga-like poses, suggest that yoga may have been practiced in this ancient civilization.
Vedic Period (1500–500 BCE): The Vedic texts, including the Rigveda, contain hymns and rituals that suggest early forms of meditation and spiritual practices. Yoga is mentioned in the Rigveda, although in a broader context referring to spiritual discipline and inner control.
Upanishadic Period (800–200 BCE): The Upanishads, philosophical texts that explore the nature of reality and the self, contain teachings on yoga as a means of self-realization and liberation (moksha). This period saw the development of various yogic concepts, such as karma (action), dharma (duty), and reincarnation.
Classical Period (500 BCE–800 CE): The classical period of yoga saw the codification and systematization of yogic practices. The Yoga Sutras of Patanjali, compiled around the 2nd century CE, is one of the most influential texts on classical yoga philosophy. It outlines the eightfold path of yoga (Ashtanga yoga), which includes ethical guidelines (yamas and niyamas), physical postures (asanas), breath control (pranayama), and meditation (dhyana).
Post-Classical Period (800–1700 CE): During this period, various schools of yoga emerged, each emphasizing different aspects of the practice. Tantra yoga, for example, focused on ritual practices and energetic techniques to achieve spiritual awakening. Hatha yoga, which arose around the 9th century CE, emphasized physical postures, breath control, and purification practices.
Modern Period (Late 19th Century–Present): The modern period of yoga saw the spread of yoga to the West and the emergence of various yoga styles and traditions. Swami Vivekananda, a prominent Indian yogi, introduced yoga to the West in the late 19th century, sparking interest in Indian philosophy and spirituality. In the 20th century, figures such as T. Krishnamacharya, B.K.S. Iyengar, and K. Pattabhi Jois played key roles in popularizing yoga and developing modern yoga styles such as Vinyasa, Iyengar, and Ashtanga yoga.
Throughout its history, yoga has evolved and adapted to different cultural and religious contexts, but its underlying goal of spiritual growth and self-realization remains central to its practice. Today, yoga is practiced worldwide and continues to evolve, with practitioners exploring new styles, techniques, and applications of this ancient tradition.
References:
Feuerstein, Georg. “The Yoga Tradition: Its History, Literature, Philosophy and Practice.” Hohm Press, 2001.
Singleton, Mark. “Yoga Body: The Origins of Modern Posture Practice.” Oxford University Press, 2010.
White, David Gordon. “The Yoga Sutra of Patanjali: A Biography.” Princeton University Press, 2014.
Mallinson, James, and Mark Singleton. “Roots of Yoga.” Penguin Classics, 2017.
Deshpande, Madhav. “Yoga for Transformation: Ancient Teachings and Practices for Healing the Body, Mind, and Heart.” Sounds True, 2018.
These references provide comprehensive insights into the historical, philosophical, and practical aspects of yoga, offering valuable information for further exploration and study.
Exploring the Ancient Wisdom of Ayurveda A Comprehensive Guide.
Ayurvedic medicine
Ayurvedic treatments
Ayurvedic herbs
Ayurvedic remedies
Welcome to our journey through the fascinating world of Ayurveda, an ancient healing system with roots deep in the Indian subcontinent. In this article, we’ll delve into the etymology, principles, practice, and modern applications of Ayurveda, shedding light on its rich history, therapeutic techniques, and ongoing research.
Etymology:
The term “Ayurveda” originates from Sanskrit, where “Ayur” means life and “Veda” means knowledge or science. Together, Ayurveda translates to “the science of life,” reflecting its holistic approach to health and well-being.
Eight Components:
Ayurveda divides medicine into eight canonical components known as Ashtanga Ayurveda. These include internal medicine, surgery, ear-nose-throat (ENT) treatment, pediatrics, toxicology, rejuvenation therapy, aphrodisiacs, and psychiatry.
Principles and Terminology:
At the core of Ayurveda lie three elemental doshas: Vata (air and ether), Pitta (fire and water), and Kapha (earth and water). Balance among these doshas is essential for health, while imbalance leads to disease. Ayurvedic texts also describe the importance of proper diet, lifestyle, and seasonal routines in maintaining equilibrium.
Practice:
Ayurveda employs a variety of therapeutic modalities to restore balance and promote well-being. These include herbal medicine, dietary adjustments, meditation, yoga, massage, detoxification procedures (Panchakarma), and lifestyle recommendations tailored to individual constitution and imbalances.
Ayurvedic preparations often include a wide array of natural substances, including herbs, minerals, metals, and animal products. These ingredients are combined to create complex formulations aimed at addressing specific health concerns and restoring harmony within the body.
Panchakarma:
Panchakarma is a cornerstone of Ayurvedic detoxification therapy, consisting of five cleansing procedures: Vamana (emesis), Virechana (purgation), Basti (enema), Nasya (nasal administration), and Raktamokshana (bloodletting). These procedures aim to eliminate toxins, rejuvenate tissues, and restore balance.
Current Status:
Ayurveda continues to thrive both within and outside the Indian subcontinent, with a growing global interest in its holistic approach to health and wellness. Ayurvedic clinics, spas, and retreats offer a range of treatments, while Ayurvedic products and supplements are increasingly popular worldwide.
Outside the Indian Subcontinent:
Ayurveda’s influence extends beyond its place of origin, with practitioners and enthusiasts around the world embracing its principles and practices. Ayurvedic centers and schools can be found in numerous countries, offering education, consultations, and treatments to a diverse clientele.
Ayurvedic yoga
Ayurvedic wellness
Holistic healing
Traditional medicine
Classification and Efficacy:
While Ayurveda has been classified as pseudoscientific by some, its efficacy in promoting health and well-being is supported by centuries of tradition and ongoing research. Studies have explored Ayurvedic interventions for various conditions, with promising results in areas such as stress reduction, pain management, and digestive disorders.
Research:
Ongoing research seeks to further understand the mechanisms of action behind Ayurvedic therapies and validate their efficacy through rigorous scientific inquiry. Collaborations between Ayurvedic practitioners and modern researchers aim to bridge the gap between traditional wisdom and evidence-based medicine.
Use of Toxic Metals:
Concerns have been raised about the presence of toxic metals such as lead, mercury, and arsenic in some Ayurvedic preparations. Quality control measures and regulatory standards are essential to ensure the safety and efficacy of Ayurvedic products and protect public health.
History:
Ayurveda boasts a rich historical legacy dating back thousands of years, with ancient texts such as the Charaka Samhita and Sushruta Samhita laying the foundation for its practice. Over centuries, Ayurveda has evolved and adapted to changing cultural and scientific landscapes, yet its core principles remain rooted in timeless wisdom.
As Ayurveda continues to evolve and spread globally, collaborations between traditional practitioners and modern healthcare systems offer new avenues for integration and innovation. By embracing its heritage while embracing modern advancements, Ayurveda holds the promise of a holistic approach to health that transcends borders and cultures.
References:
Charaka Samhita: The Ayurvedic Classic. (n.d.). Retrieved from [source]
Sushruta Samhita: Ancient Surgical Treatise. (n.d.). Retrieved from [source]
Chopra, A., Saluja, M., Tillu, G., & Sarmukkaddam, S. (2019). Ayurveda-modern medicine interface: A critical appraisal of studies of Ayurvedic medicines to treat osteoarthritis and rheumatoid arthritis. Journal of Ayurveda and Integrative Medicine, 10(1), 11–18. [source]
Ayurvedic Medicines Ancient Remedies for Modern Wellness
Ayurvedic medicines are traditional remedies that have been used for centuries in the practice of Ayurveda, a holistic healing system originating from India. These medicines are derived from natural sources such as herbs, minerals, metals, and animal products, and are prepared using traditional methods based on ancient Ayurvedic texts.
Philosophy and Principles:
The philosophy behind Ayurvedic medicines is rooted in the belief that balance is key to health, and imbalances in the body’s doshas (Vata, Pitta, and Kapha) can lead to illness. Ayurvedic treatments aim to restore this balance by addressing the root cause of the problem rather than just alleviating symptoms.
Ayurvedic consultations
Ayurvedic herbs and spices
Ayurvedic principles
Ayurvedic philosophy
Types of Ayurvedic Medicines:
There is a wide variety of Ayurvedic medicines available, each formulated to target specific health issues or imbalances. Some common types of Ayurvedic medicines include:
Herbal Formulations
Rasayanas
Ayurvedic Oils
Ayurvedic Churnas
Ayurvedic Syrups and Tonics
Famous Ayurvedic Products:
When it comes to famous Ayurvedic products, there are several well-known brands and formulations that have gained popularity both in India and around the world. Some of these include:
Dabur Chyawanprash
Himalaya Liv.52
Patanjali Divya Swasari Ras
Baidyanath Shankhpushpi Syrup
Zandu Vigorex Capsules
While Ayurvedic medicines can be effective for certain health conditions, it’s always advisable to consult with a qualified Ayurvedic practitioner or healthcare professional before starting any new treatment regimen. Additionally, quality and safety standards vary among Ayurvedic products, so it’s essential to choose reputable brands and products with proper certification and quality assurance.
Future Pathways and Potential: Navigating Forward: Ayurveda’s Trajectory in the 21st Century
Integrating Tradition with Innovation:
Modern Applications: Integrating Ayurvedic Wisdom with Contemporary Science
Ayurvedic Pharmaceuticals: Innovations in Formulations and Delivery
Ayurveda and Sustainable Healthcare: A Model for the Future
Digital Age and Accessibility:
Ayurveda in the Digital Era: Online Platforms for Wellness and Education
Telemedicine and Remote Consultations: Bridging Gaps in Healthcare Access
Ayurveda Apps and Wearable Technology: Personalized Wellness at Your Fingertips
Conclusion: Ayurveda: A Timeless Tradition, A Continuing Journey
In conclusion, Ayurveda offers a holistic approach to health and wellness that has stood the test of time. By integrating ancient wisdom with modern research and practice, Ayurveda continues to inspire healing and transformation on a global scale.
The ultimate guide to achieving a lean, muscular body. From effective workout routines and nutrition plans to tips for progressive overload and recovery strategies, this comprehensive blog post covers everything you need to know to sculpt your ideal physique. Whether you’re a beginner or an experienced gym-goer, learn how to maximize muscle growth, optimize your diet, and achieve your fitness goals with confidence. Unlock the secrets to building a strong, toned body and transform your health and physique today.
1. Introduction: Embarking on the journey to sculpt a muscular body requires dedication, discipline, and a strategic approach. While the process can seem overwhelming, with the right plan and consistency, achieving a muscular body is entirely within reach. In this detailed guide, we will provide you with a step-by-step plan, outlining exercises, nutrition, and a timeline to help you build muscle effectively. By following this roadmap, you can expect to see noticeable results within a few months.
2. Setting Clear Goals: Before diving into your muscle-building journey, it’s essential to establish clear and achievable goals. Determine what you want to accomplish—whether it’s gaining muscle mass, increasing strength, or enhancing muscle definition. Setting specific, measurable, and realistic goals will provide you with direction and motivation throughout your journey.
3. Designing Your Workout Routine: Crafting a well-rounded workout routine is crucial for building muscle effectively. Aim to incorporate a mix of strength training, compound exercises, isolation movements, and cardio into your regimen. Here’s a breakdown of a weekly workout plan:
3.1 Day 1: Full-Body Strength Training
Begin with compound exercises such as squats, deadlifts, bench presses, and pull-ups.
Perform 3 sets of 8-12 reps for each exercise, focusing on proper form and technique.
Include isolation exercises like bicep curls, tricep extensions, and calf raises to target specific muscle groups.
3.2 Day 2: Cardio and Core Workout
Incorporate 30-45 minutes of cardiovascular exercise such as running, cycling, or swimming to improve cardiovascular health and burn calories.
Follow with core exercises such as planks, Russian twists, and leg raises to strengthen and define your abdominal muscles.
3.3 Day 3: Rest or Active Recovery
Allow your muscles to recover and repair by taking a rest day or engaging in light activities such as yoga or stretching.
4. Focus on Progressive Overload: To continue making progress and building muscle, it’s essential to incorporate progressive overload into your workouts. Gradually increase the weight, reps, or intensity of your exercises over time to challenge your muscles and stimulate growth. Keep track of your progress and adjust your workout routine accordingly to ensure continued improvement.
5. Optimize Nutrition for Muscle Growth: Nutrition plays a significant role in supporting muscle growth and recovery. Focus on consuming a balanced diet rich in lean proteins, complex carbohydrates, healthy fats, and essential vitamins and minerals. Aim to eat protein-rich foods such as chicken, fish, eggs, tofu, and legumes with every meal to promote muscle repair and growth. Additionally, stay hydrated by drinking plenty of water throughout the day to support optimal muscle function and recovery.
6. Conclusion (H2): Building a muscular body requires dedication, consistency, and patience. By following a structured workout routine, incorporating progressive overload, and fueling your body with proper nutrition, you can achieve your desired physique. Remember to listen to your body, prioritize rest and recovery, and celebrate your progress along the way. With perseverance and determination, you can transform your body and achieve your fitness goals.
The Ultimate Belly Fat Diet Plan Your 7-Day Guide to Shedding Pounds with Fruits, Vegetables, and Protein
Introduction:
Are you tired of struggling with stubborn belly fat? It’s time to take control of your diet and transform your body. With the right combination of fruits, vegetables, and protein, you can create a meal plan that not only helps you lose weight but also targets that troublesome belly fat. In this comprehensive guide, we’ll walk you through a 7-day belly fat diet plan, covering what to eat before and after exercise, as well as throughout the day.
Day 1: Jumpstart Your Journey
Morning (Approx. 400-500 Calories): Kickstart your metabolism with a protein-rich breakfast omelet packed with spinach, tomatoes, and mushrooms.
Afternoon (Approx. 500-600 Calories): Enjoy a large salad with:
Leafy greens
Cucumbers
Grilled chicken or tofu for protein
Evening (Approx. 500-600 Calories): Indulge in grilled salmon with:
Steamed broccoli
Quinoa
Night (Approx. 100-200 Calories): Opt for a light snack such as a piece of fruit or a small handful of nuts.
Day 2: Energize Your Workouts
Morning (Approx. 400-500 Calories): Fuel up with a banana or apple paired with almond butter before your workout.
Afternoon (Approx. 500-600 Calories): Replenish with a protein smoothie post-exercise, loaded with:
Greek yogurt
Spinach
Pineapple
Evening (Approx. 500-600 Calories): Opt for a turkey and avocado wrap or lettuce wrap for a light yet fulfilling dinner option.
Night (Approx. 100-200 Calories): Have a cup of herbal tea or a small serving of Greek yogurt.
Day 3: Maintain Your Momentum
Morning (Approx. 400-500 Calories): Start with a fiber-rich breakfast bowl made with:
Oats
Chia seeds
Mixed berries
Afternoon (Approx. 500-600 Calories): Enjoy a quinoa salad with:
Roasted vegetables
Chickpeas
Evening (Approx. 500-600 Calories): Treat yourself to a lean beef stir-fry with:
Brown rice
Night (Approx. 100-200 Calories): Satisfy late-night cravings with a small serving of Greek yogurt topped with honey or a piece of fruit.
Day 4: Boost Your Metabolism
Morning (Approx. 400-500 Calories): Begin your day with a green smoothie packed with:
Spinach
Kale
Banana
Afternoon (Approx. 500-600 Calories): Snack on walnuts or almonds for a boost of healthy fats and protein.
Night (Approx. 100-200 Calories): Sip on a glass of warm milk or herbal tea to promote relaxation and aid digestion before sleep.
Foods to Avoid:
Throughout this 7-day plan, steer clear of sugary drinks, processed foods, and excessive sodium. Limit alcohol consumption and avoid late-night snacking to maximize your results.
Conclusion:
By following this 7-day belly fat diet plan, packed with fruits, vegetables, and protein, you’re well on your way to achieving your weight loss goals. Stay consistent, stay hydrated, and say hello to a healthier, happier y
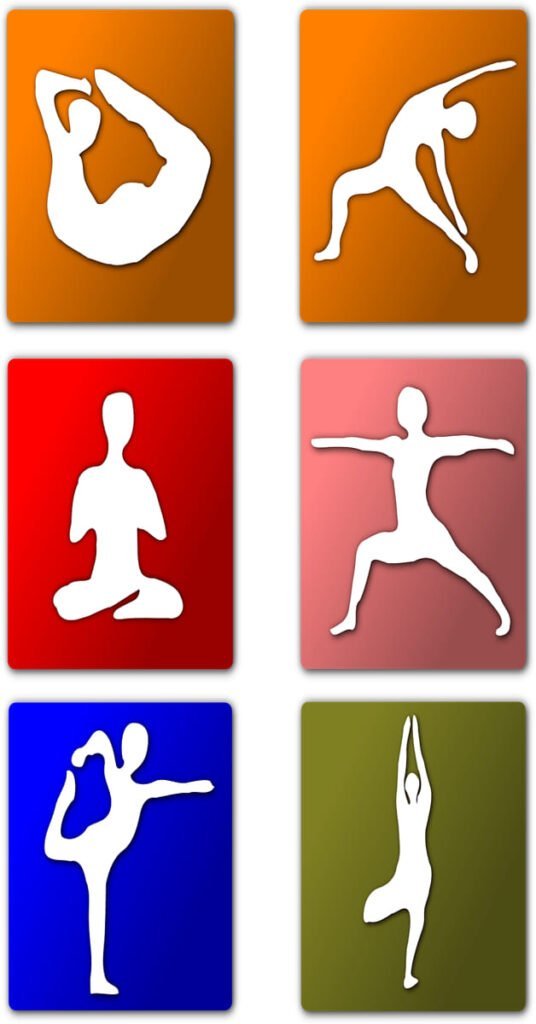
Here are Top10 safe and effective exercises for pregnant women, along with step-by-step instructions and recommended timing for Pregnancy Exercises:
Pregnant girl in a gym. Sports girl in a sportswear.
Pregnancy Exercise Duration Chart
Weeks Pregnant
Start Time
End Time
1-12
30 minutes
1 hour
13-24
20 minutes
45 minutes
25-36
15 minutes
30 minutes
37+
10 minutes
20 minutes
Best Exercises for Normal Delivery
Exercise
Duration (Weeks)
Walking
Throughout pregnancy
Swimming
Throughout pregnancy
Pelvic Floor Exercises (Kegels)
Throughout pregnancy
Yoga
Throughout pregnancy
Prenatal Pilates
Throughout pregnancy
Low-Impact Aerobics
Throughout pregnancy
Stationary Cycling
Throughout pregnancy
Strength Training (with proper guidance)
Throughout pregnancy
Dancing
Throughout pregnancy
Pelvic Tilts
Throughout pregnancy
1. Walking
Timing:
Aim for a 30-45 minute session. By following this step-by-step guide, you can safely incorporate walking into your prenatal fitness routine to improve cardiovascular health, boost mood, and promote overall well-being during pregnancy. Remember to listen to your body, stay hydrated, and consult with your healthcare provider before starting any new exercise regimen.
Steps:
1. Warm-Up (5 minutes): Begin with a gentle warm-up by walking at a slow pace for 5 minutes. Swing your arms gently and focus on taking deep breaths to prepare your body for exercise.
2. Main Walking Session (30-35 minutes): Maintain a steady pace throughout your walk, focusing on good posture and proper alignment. Walk briskly enough to elevate your heart rate and break a light sweat, but avoid overexertion or breathlessness. Enjoy the rhythm of your steps and the scenery around you as you walk.
3. Incorporate Intervals (5-10 minutes): If you feel up to it, incorporate intervals of increased intensity into your walk. For example, walk at a faster pace for 1-2 minutes, then return to your regular pace for 2-3 minutes. Repeat these intervals throughout your walk to challenge yourself and improve cardiovascular fitness.
4. Cool Down (5 minutes): Gradually slow your pace during the last 5 minutes of your walk to allow your heart rate to return to normal. Take deep breaths and focus on slowing your breathing as you transition back to a relaxed state.
5. Stretching (5-10 minutes): Finish your walk with some gentle stretching exercises to help prevent muscle tightness and improve flexibility. Focus on stretching the major muscle groups used during walking, such as the calves, hamstrings, quadriceps, and hip flexors. Hold each stretch for 15-30 seconds and avoid bouncing or jerking movements.
6. Hydrate and Rest: Drink plenty of water throughout your walk to stay hydrated, and take breaks as needed to rest and catch your breath. Listen to your body and stop if you experience any discomfort or pain.
7. Monitor Your Body: Pay attention to how your body responds to walking and adjust your pace or distance as needed. If you experience any unusual symptoms or have concerns about your pregnancy, consult with your healthcare provider.
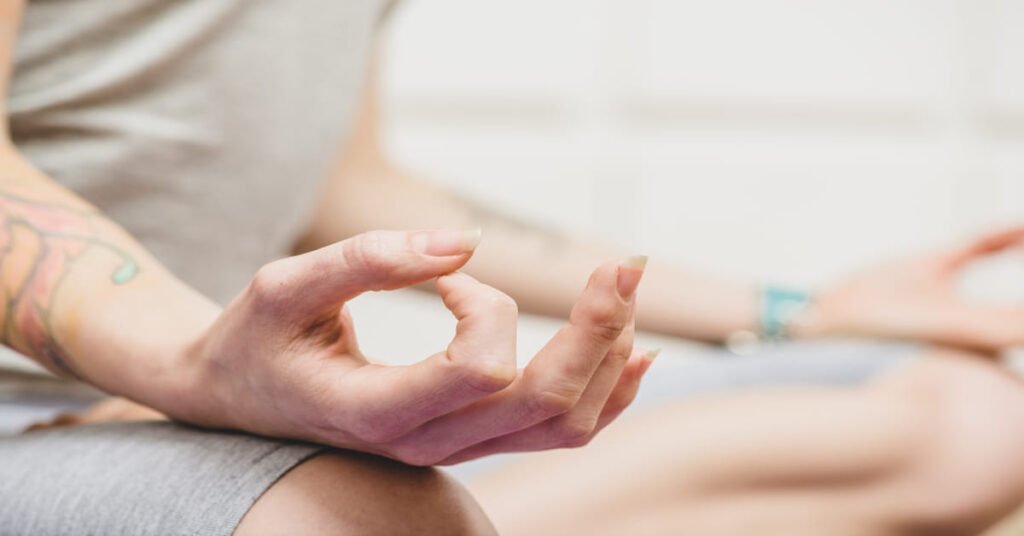
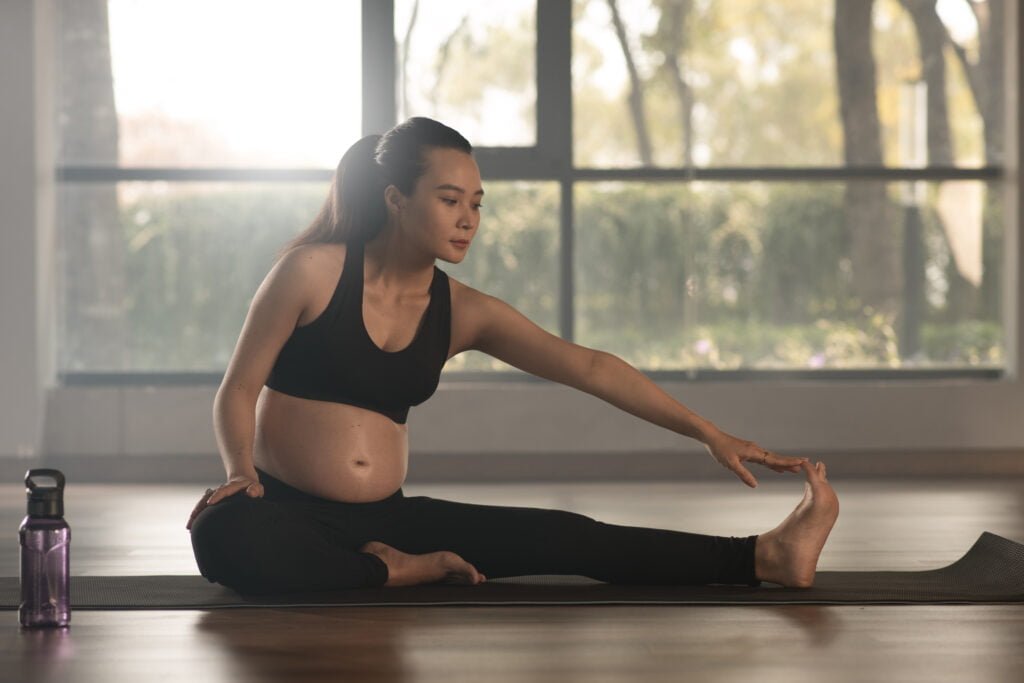
2. Prenatal Yoga
Timing:
Aim for 30-60 minutes of Practice regularly, modify poses as needed, and consult your healthcare provider. Enjoy the physical and emotional benefits of prenatal yoga.
Steps:
1. Centering (5 minutes): Find a comfortable seated position, close your eyes, and take deep breaths.
2. Warm-Up (5 minutes): Start with gentle movements like neck rolls and Cat-Cow stretches.
3. Standing Poses (10 minutes): Practice Warrior I, Warrior II, and Tree Pose for strength and stability.
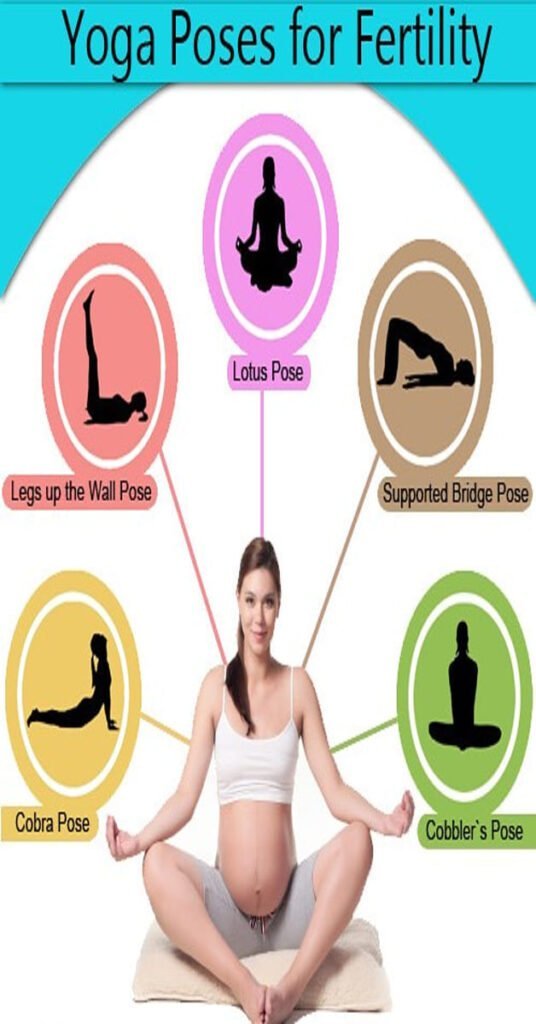
4. Seated Poses (10 minutes): Move to seated poses like Cobbler’s Pose and Seated Forward Fold for hip and pelvis opening.
5. Gentle Twists and Side Stretches (5 minutes): Incorporate poses like Revolved Side Angle and Half Moon Pose.
6. Hip Openers (10 minutes): Spend time in Pigeon Pose and Bound Angle Pose to prepare for childbirth.
7. Cool Down and Relaxation (10 minutes): Wind down with poses like Legs-Up-the-Wall and Supported Savasana.
8. Closing (5 minutes): Reflect on your practice and connect with your baby.
3. Swimming
Timing:
Swim for 20-30 minutes, 2-3 times per week Remember to listen to your body, stay hydrated, and avoid overheating. Consult with your healthcare provider before starting any new exercise routine, especially if you have any medical conditions or concerns. Enjoy the soothing and low-impact benefits of prenatal swimming for a healthier pregnancy journey.
Steps:
1. Warm-Up (10 minutes): Begin with gentle movements such as walking or floating on your back to warm up your muscles and acclimate to the water’s temperature.
2. Basic Strokes (15 minutes): Practice basic swimming strokes like freestyle and breaststroke, focusing on smooth and controlled movements to avoid strain.
3. Floating and Relaxation (10 minutes): Spend time floating on your back or using flotation devices for support. Focus on deep breathing and relaxation techniques to reduce tension and promote relaxation.
4. Leg Exercises (10 minutes): Perform leg exercises such as leg kicks or flutter kicks to strengthen leg muscles and improve circulation in the lower body.
5. Cool Down (5 minutes): Finish your session with a few minutes of gentle floating or walking in the water to gradually lower your heart rate and ease back into dry land.
4. Stationary Cycling
Timing:
Aim for a 30-60 minute session. Always consult with your healthcare provider before starting any new exercise routine, especially during pregnancy. Stay hydrated, pay attention to your body’s signals, and stop exercising if you experience any pain, discomfort, or dizziness. Enjoy the benefits of stationary cycling for a safe and effective prenatal workout.
Steps:
1. Warm-Up (10 minutes): Begin with a gentle warm-up, pedaling at a slow pace with low resistance to get your muscles moving and your heart rate up.
2. Gradual Increase (10 minutes): Gradually increase the resistance and pace of your cycling, but avoid pushing yourself too hard. Maintain a moderate intensity level throughout.
3. Interval Training (15 minutes): Incorporate intervals of higher-intensity cycling followed by periods of lower intensity or rest. Alternate between moderate and vigorous efforts to challenge your cardiovascular system.
4. Cool Down (10 minutes): Towards the end of your session, gradually reduce the resistance and pace of your cycling to allow your heart rate to return to its resting state. Continue pedaling at a slow pace to cool down your muscles.
5. Stretching (5 minutes): Finish your workout with some gentle stretching exercises to help prevent muscle tightness and improve flexibility. Focus on stretching the muscles used during cycling, such as the quadriceps, hamstrings, and calves.
5. Modified Pilates
Timing:
Aim for a 30-60 minute session. Remember to listen to your body, modify exercises as needed, and avoid any movements that cause discomfort or strain. Consult with your healthcare provider before starting any new exercise routine, especially if you have any medical conditions or concerns. Enjoy the strengthening, toning, and relaxation benefits of prenatal-modified Pilates for a healthier pregnancy journey.
Steps:
1. Warm-Up (10 minutes): Begin with gentle movements to warm up your body, such as marching in place or pelvic tilts while lying on your back. Focus on engaging your core muscles and connecting with your breath.
2. Mat Work (15 minutes): Transition to mat work focusing on core strength and stability. Perform modified versions of classic Pilates exercises such as pelvic curls, leg slides, and modified hundred. Use props like pillows or yoga blocks for support as needed.
3. Standing Exercises (10 minutes): Move to standing exercises to work on balance, posture, and leg strength. Perform exercises like standing leg lifts, side leg lifts, and calf raises while holding onto a sturdy surface for support.
4. Stretching and Relaxation (10 minutes): Finish your session with gentle stretching exercises to lengthen and release tension in your muscles. Focus on stretches for the back, hips, and legs, and incorporate deep breathing and relaxation techniques to promote relaxation.
5. Cool Down (5 minutes): Gradually bring your heart rate down with some light walking or marching in place. Take this time to connect with your body and your baby, and reflect on your practice.
6. Pelvic Floor Exercises (Kegels)
Timing:
Perform throughout the day, aiming for 10-15 repetitions per session. By incorporating these steps into your daily routine, you can strengthen your pelvic floor muscles, improve bladder control, and support your body throughout pregnancy and childbirth. Remember to consult with your healthcare provider before starting any new exercise regimen, especially if you have any underlying health conditions or concerns.
Steps:
1. Find Your Pelvic Floor Muscles: Sit or lie down comfortably and imagine stopping the flow of urine midstream. The muscles you engage to do this are your pelvic floor muscles.
2. Perform a Kegel Contraction: Once you’ve identified your pelvic floor muscles, contract them by squeezing and lifting them upward. Hold the contraction for 3-5 seconds, then release.
3. Relax and Repeat: After releasing the contraction, fully relax your pelvic floor muscles before starting the next repetition. Aim to perform 10-15 repetitions in a row, gradually increasing as your strength improves.
4. Breathe Normally: Remember to continue breathing normally throughout the exercise. Avoid holding your breath, as this can increase tension in your pelvic floor muscles.
5. Incorporate into Daily Routine: Perform Kegel exercises multiple times throughout the day, such as during commercial breaks, while waiting in line, or during other daily activities. Aim for at least three sets of Kegels each day.
6. Monitor Progress: Pay attention to any changes in pelvic floor strength and sensation over time. If you experience any pain or discomfort, consult with your healthcare provider.
7. Light Weight Training
Timing:
Aim for a 30-45 minute session. By following this step-by-step guide, you can safely incorporate lightweight training into your prenatal fitness routine, helping to maintain strength, stability, and overall well-being throughout pregnancy. As always, consult with your healthcare provider before starting any new exercise regimen, especially if you have any underlying health conditions or concerns.
Steps:
1. Warm-Up (5 minutes): Begin with a brief warm-up to prepare your muscles for exercise. Perform light cardiovascular activity such as walking or marching in place to increase blood flow and warm up your body.
2. Select Appropriate Weights: Choose light weights that allow you to perform exercises with proper form and without straining. Aim for weights that feel challenging but manageable, typically ranging from 1 to 5 pounds.
3. Focus on Form: Prioritize proper form and technique throughout your workout to prevent injury. Maintain a neutral spine, engage your core muscles, and move through each exercise with control and precision.
4. Perform Compound Exercises: Incorporate compound exercises that target multiple muscle groups simultaneously. Examples include squats, lunges, and modified push-ups. Start with body weight or light resistance and gradually increase as needed.
5. Include Upper Body Exercises: Incorporate exercises to strengthen the upper body, such as bicep curls, shoulder presses, and tricep extensions. Use light weights and focus on controlled movements to avoid strain.
6. Incorporate Lower Body Exercises: Include exercises to strengthen the lower body, such as leg presses, calf raises, and hamstring curls. Use light weights or resistance bands and focus on maintaining stability and balance.
7. Mind Your Breathing: Remember to breathe steadily and rhythmically throughout each exercise. Inhale during the eccentric phase (lowering or lengthening) and exhale during the concentric phase (lifting or shortening).
8. Cool Down and Stretch (5 minutes): Finish your workout with a brief cool-down to lower your heart rate and stretch your muscles. Perform gentle stretches targeting the major muscle groups, holding each stretch for 15-30 seconds.
9. Hydrate and Rest: Drink plenty of water throughout your workout to stay hydrated, and allow your body time to rest and recover between sets and exercises.
10. Monitor Your Body: Pay attention to how your body responds to each exercise and adjust as needed. If you experience any discomfort or pain, stop the exercise and consult with your healthcare provider.
8. Prenatal Tai Chi
Timing:
Aim for a 30-45 minute session. By following this step-by-step guide, you can safely incorporate Tai Chi into your prenatal fitness routine, promoting relaxation, balance, and overall well-being during pregnancy. As always, consult with your healthcare provider before starting any new exercise regimen, especially if you have any underlying health conditions or concerns.
Steps:
1. Warm-Up (5 minutes): Begin with gentle movements to warm up your body and prepare for Tai Chi practice. Perform light stretching exercises or take a short walk to increase blood flow and loosen your muscles.
2. Centering and Breath Awareness (5 minutes): Find a comfortable standing position with your feet shoulder-width apart. Close your eyes and take several deep breaths, focusing on inhaling and exhaling slowly and deeply. Center your mind and bring your awareness to the present moment.
3. Begin with Qigong Exercises (10 minutes): Start your Tai Chi practice with Qigong exercises to cultivate energy, balance, and relaxation. Perform gentle movements such as Cloud Hands, Standing Meditation, or Flowing Water Sleeves to connect with your breath and cultivate internal energy (Qi).
4. Practice Tai Chi Forms (20 minutes): Move into Tai Chi forms or sequences that are safe and suitable for pregnancy. Focus on slow, flowing movements that promote balance, flexibility, and mindfulness. Begin with basic forms such as Tai Chi for Beginners or Tai Chi for Health, and modify movements as needed to accommodate your changing body.
5. Mindful Movement and Meditation (5 minutes): Conclude your Tai Chi practice with a brief period of mindful movement and meditation. Slowly transition into stillness, focusing on your breath and allowing any tension or stress to melt away. Embrace a sense of calm, balance, and inner peace.
6. Cool Down and Relaxation (5 minutes): Finish your Tai Chi practice with a gentle cool-down and relaxation period. Perform gentle stretches or return to standing meditation, allowing your body and mind to fully relax and rejuvenate.
7. Hydrate and Reflect: Drink plenty of water throughout your practice to stay hydrated, and take a moment to reflect on your experience. Notice any changes in your body, mind, and emotions, and acknowledge the benefits of your Tai Chi practice for both yourself and your baby.
9. Low-Impact Aerobics
Timing:
Aim for a 30-45 minute session. By following this step-by-step guide, you can safely incorporate low-impact aerobics into your prenatal fitness routine, improving cardiovascular health, strength, and overall well-being during pregnancy. As always, consult with your healthcare provider before starting any new exercise regimen, especially if you have any underlying health conditions or concerns.
Steps:
1. Warm-Up (5 minutes): Begin with a gentle warm-up to prepare your body for exercise. Perform light cardiovascular activities such as marching in place, side steps, or gentle arm swings to increase blood flow and warm up your muscles.
2. Cardiovascular Exercise (20 minutes): Incorporate low-impact aerobic exercises that elevate your heart rate without putting strain on your joints. Examples include walking, marching, low-impact dancing, or using a stationary bike or elliptical machine. Focus on maintaining a steady pace and rhythm throughout the session.
3. Strength Training (15 minutes): Integrate strength training exercises to build muscle strength and endurance. Use light weights or resistance bands to perform exercises such as bicep curls, shoulder presses, squats, lunges, and leg lifts. Focus on proper form and controlled movements to avoid injury.
4. Core Strengthening (10 minutes): Dedicate time to strengthening your core muscles, which provide stability and support during pregnancy and childbirth. Perform exercises such as pelvic tilts, abdominal bracing, and modified planks to engage your core muscles safely and effectively.
5. Cool Down and Stretch (5 minutes): Conclude your workout with a gentle cool-down to lower your heart rate and stretch your muscles. Perform static stretches targeting major muscle groups such as the legs, arms, back, and shoulders. Hold each stretch for 15-30 seconds and focus on deep breathing to promote relaxation.
6. Hydrate and Rest: Drink plenty of water throughout your workout to stay hydrated, and allow your body time to rest and recover between exercises. Listen to your body and modify exercises as needed to accommodate any discomfort or fatigue.
7. Monitor Your Body: Pay attention to how your body responds to each exercise and adjust intensity or duration as needed. Stop any exercise that causes pain or discomfort, and consult with your healthcare provider if you have any concerns.
10. Prenatal Breathing Exercises
Timing:
Incorporate these exercises into your daily routine as needed. Incorporate these prenatal breathing exercises into your daily routine to promote relaxation, reduce stress, and enhance your overall well-being during pregnancy. Remember to listen to your body and adjust the exercises as needed to suit your individual needs and comfort level. If you have any concerns or medical conditions, consult with your healthcare provider before starting any new breathing exercises.
Steps:
Find a Comfortable Position: Sit or lie down in a comfortable position, with your spine straight and your shoulders relaxed.
1. Deep Belly Breathing (5 minutes): Place one hand on your chest and the other on your abdomen. Inhale deeply through your nose, allowing your abdomen to rise as you fill your lungs with air. Exhale slowly through your mouth, drawing your navel toward your spine to fully empty your lungs. Repeat for 5 minutes, focusing on the rise and fall of your abdomen with each breath.
2. Alternate Nostril Breathing (3 minutes): Close your right nostril with your right thumb and inhale slowly through your left nostril. Close your left nostril with your ring finger, release your right nostril, and exhale slowly through your right nostril. Inhale through your right nostril, close it with your thumb, release your left nostril, and exhale through your left nostril. Continue alternating nostrils for 3 minutes, focusing on the rhythm of your breath.
3. Ujjayi Breathing (3 minutes): Inhale deeply through your nose while constricting the back of your throat to create a soft “ocean wave” sound. Exhale slowly through your nose, maintaining the constriction in the throat to produce the same sound. Continue this deep, audible breathing for 3 minutes, allowing it to calm your mind and deepen your relaxation.
4. 4-7-8 Breathing (2 minutes): Inhale deeply through your nose for a count of 4 seconds, allowing your abdomen to rise. Hold your breath for a count of 7 seconds. Exhale slowly through your mouth for a count of 8 seconds, emptying your lungs. Repeat this pattern for 2 minutes, focusing on the length and rhythm of each breath.
5. Reflect and Relax: After completing your breathing exercises, take a moment to reflect on how you feel both physically and emotionally. Notice any changes in your body and mind, and allow yourself to fully relax and let go of any tension or stress.
By incorporating these exercises into your daily routine and following the recommended timing and steps, you can stay fit and healthy throughout your pregnancy journey. Remember to listen to your body, stay hydrated, and consult with your healthcare provider before starting any new exercise program.
Duration and Intensity Guidelines for Safe Exercise:
Importance of Exercise During Pregnancy: Regular exercise during pregnancy offers numerous benefits, including improved mood, reduced risk of gestational diabetes, enhanced stamina for labor and delivery, and faster postpartum recovery. However, it’s essential to exercise safely and effectively to avoid potential risks.
Key Indicators for Safe Exercise During Pregnancy:
Consultation with Healthcare Provider: Before starting any exercise routine during pregnancy, it’s crucial to consult with your healthcare provider. They can provide personalized recommendations based on your medical history and current health status.
Listen to Your Body: Pay attention to how your body feels during exercise. If you experience any discomfort, dizziness, or unusual symptoms, stop exercising immediately and consult your healthcare provider.
Avoid High-Impact Activities: While some forms of exercise are generally safe during pregnancy, it’s best to avoid high-impact activities that may increase the risk of injury or strain on the body.
Stay Hydrated: Drink plenty of water before, during, and after exercise to stay hydrated and prevent overheating.
Monitor Heart Rate: Keep track of your heart rate during exercise and avoid exceeding the recommended maximum heart rate for pregnant women.
Step-by-Step Guidelines for Safe and Effective Workouts for Normal Delivery:
Start Slowly: If you were not active before pregnancy, start with low-intensity exercises such as walking, swimming, or prenatal yoga. Gradually increase the duration and intensity of your workouts as your pregnancy progresses.
Choose Pregnancy-Safe Exercises: Opt for low-impact exercises that are gentle on the joints and suitable for pregnant women, such as brisk walking, stationary cycling, and modified Pilates.
Incorporate Strength Training: Include strength training exercises using light weights or resistance bands to strengthen your muscles and improve stability. Focus on exercises that target the core, back, and pelvic floor muscles.
Practice Prenatal Yoga and Stretching: Prenatal yoga and stretching exercises can help improve flexibility, reduce muscle tension, and promote relaxation. Choose gentle yoga poses and stretches that are safe for pregnancy.
Listen to Your Body: Pay attention to how your body responds to exercise and adjust your routine accordingly. If you feel tired, take breaks as needed and avoid overexertion.
Stay Consistent: Aim for regular exercise sessions lasting 30 minutes to an hour, most days of the week. Consistency is key to reaping the benefits of exercise during pregnancy.
Conclusion: Exercise plays a vital role in promoting a healthy pregnancy and preparing the body for labor and delivery. with Top 10 Pregnancy Exercises, Safe and Effective Workouts for Normal Delivery By following the duration and intensity guidelines outlined in this article, expectant mothers can safely incorporate exercise into their daily routine. Remember to listen to your body, consult with your healthcare provider, and prioritize safety at all times. With the right approach, you can optimize your pregnancy fitness journey and enjoy a healthier, happier pregnancy.